How to integrate Jira with your Confluence Cloud account
Share on socials
How to integrate Jira with your Confluence Cloud account

Jump to Section
Jump to section
Why should you use Jira in Confluence?
Five ways to integrate Confluence Cloud and Jira
1. Create a Jira issue in Confluence
2. Create a form that converts submissions to Jira issues
3. Add Jira issues to your Confluence pages
4. Create Jira reports from Confluence
5. Add a Jira shortcut to your Confluence space
Keep track of your Jira issues in Confluence! Here are five easy ways to integrate Confluence and Jira.
While Atlassian’s Confluence and Jira are both handy collaboration tools, they’re even more powerful when working together. By integrating Confluence and Jira, you can benefit from all the formatting and organisational features of Confluence while getting all the data you need from Jira.
Want to know more about the features of both platforms? Check out our blog post comparing Jira vs Confluence.
Want to know more about the features of both platforms? Check out our blog post comparing Jira vs Confluence.
Why should you use Jira in Confluence?
It should go without saying that one platform where you can handle all your work tasks is a whole lot more convenient than switching between several platforms. When using Jira in Confluence, you’re greatly decreasing the risk of crucial information (such as info about bugs) being overlooked, while increasing your productivity and team communication.
With that said, let’s get started.
With that said, let’s get started.
Five ways to integrate Confluence Cloud and Jira
1. Create a Jira issue in Confluence
To save yourself some time and reduce context-switching, you can quickly create a Jira issue straight from your Confluence page.
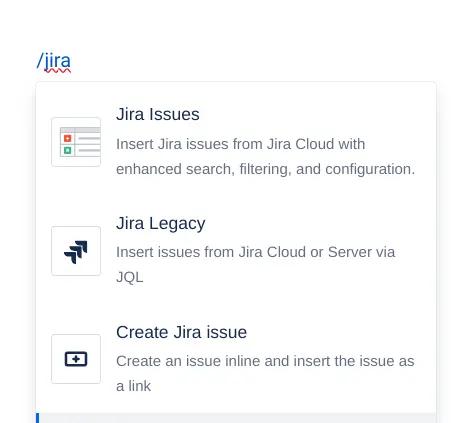
1. In edit mode, type the shortcut /jira on your Confluence page.
2. Select Create Jira issue.
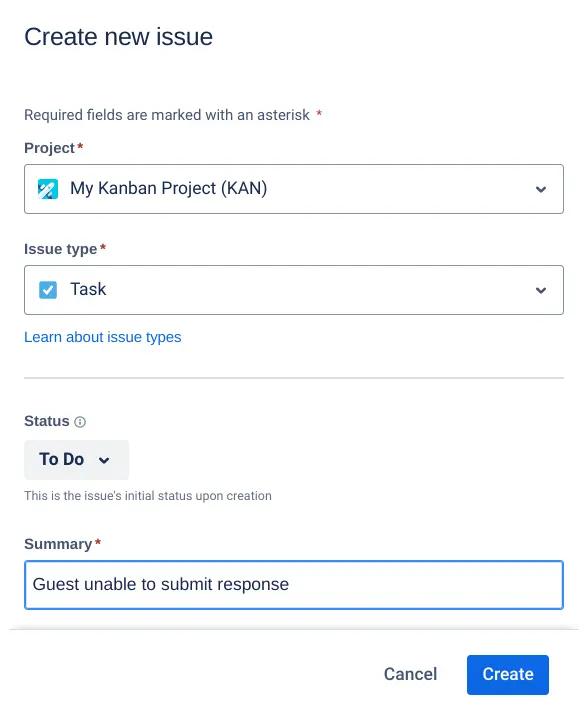
3. Choose the project that the issue belongs to, the issue type, and the status of the issue. Type in a brief description of the issue. Click Create to create the issue.
2. Create a form that converts submissions to Jira issues
With Forms for Confluence, users can submit form responses in Confluence that automatically convert to Jira issues. This reduces context switching and helps users give feedback in a place that makes sense to them (such as your company intranet).
Use it for bug reports, customer service issues, hardware requests, and more.
To get started, install Forms for Confluence and follow our documentation to link Forms for Confluence with your Jira instance.
Use it for bug reports, customer service issues, hardware requests, and more.
To get started, install Forms for Confluence and follow our documentation to link Forms for Confluence with your Jira instance.
1. Go to your chosen Confluence page and click the Forms icon in the top-right corner.

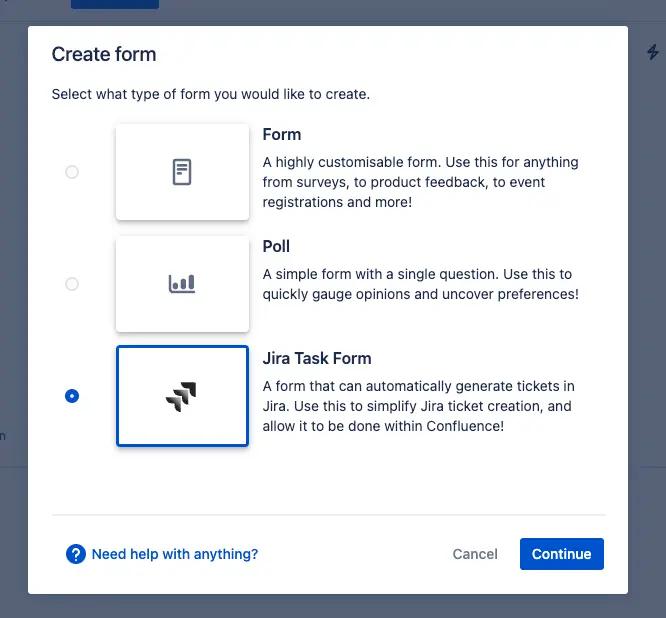
2. In the pop-up dialog, select Jira Task Form and click Continue.
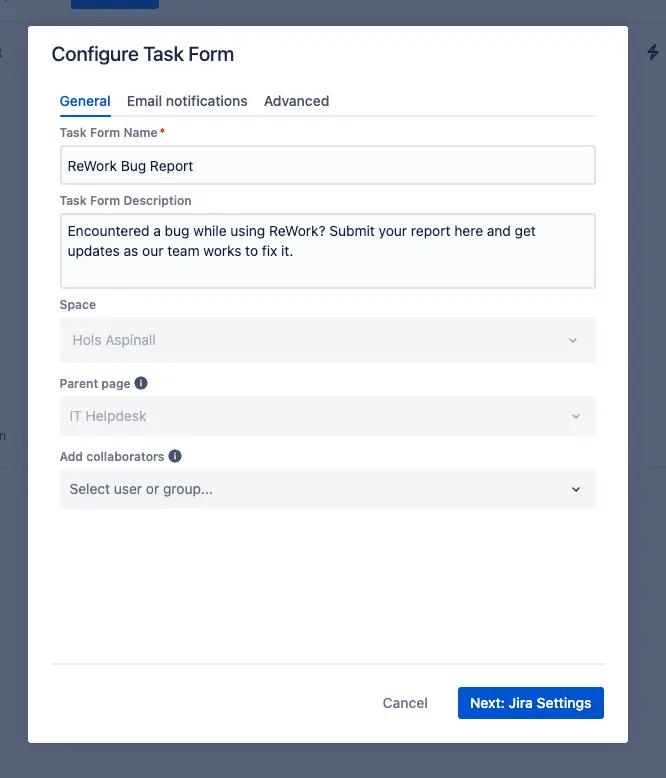
3. Add your form name, description, and any other collaborators. You can also edit email notifications and advanced settings here. Click Next: Jira Settings.
4. Here, choose your linked Jira project, ticket type, and details such as who the ticket should be assigned to. Click Proceed.
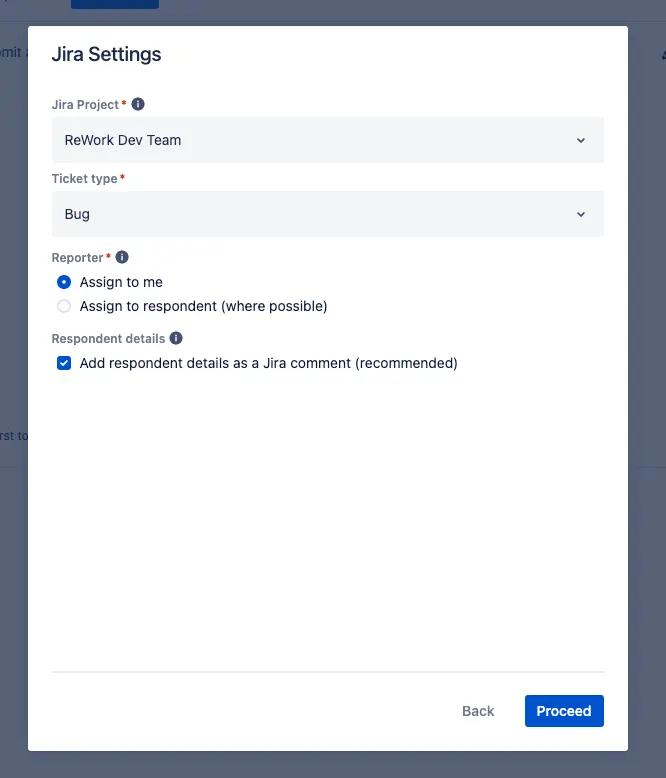
5. Edit your form details on this page and add extra fields (such as a due date) if you’d like. Click Save.
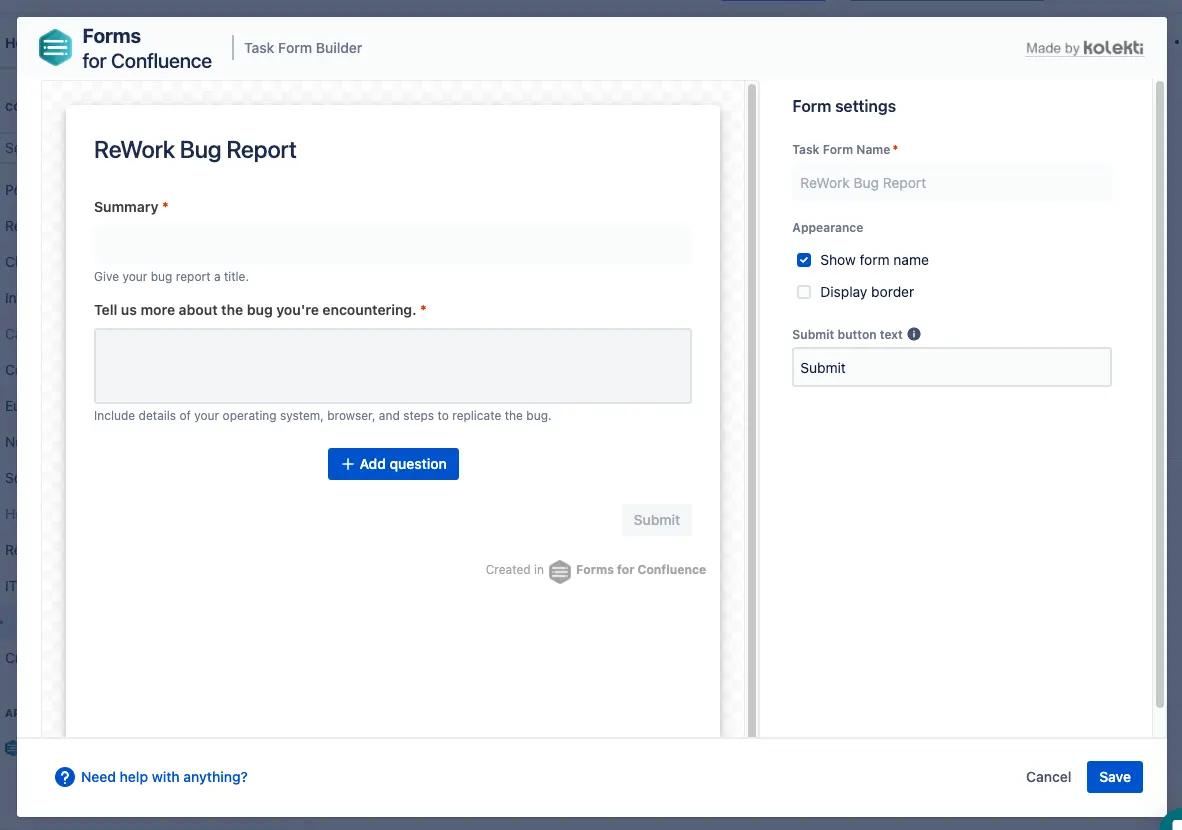
6. Click Publish or Update in the top-right corner of your Confluence page.
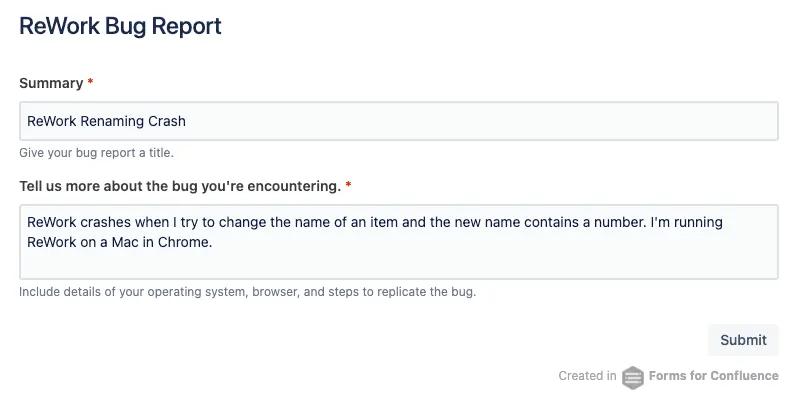
You now have a linked form that users can submit feedback on and will automatically create issues in Jira, like this:

That’s all there is to it!
3. Add Jira issues to your Confluence pages
Want to track important Jira issues within a project page? It’s simpler than you might think!
1. To add an existing Jira issue to your Confluence page, first type /jira into the page while in edit mode.
2. Select Jira Issues.

3. Search for the Jira issue by typing in a keyword, or filter by project, issue type, status, or assignee.
4. Click Insert issues.
4. Create Jira reports from Confluence
Here’s how to quickly summarise and share Jira reports from your Confluence instance.
1. Select Templates from the Confluence menu. In the templates search bar, type ‘Jira’. Click Jira report, then Use.
2. Choose which type of report you’d like to generate.
3. Select the project, which fix version (if applicable), and give the report a title. Click Create to finish.
Tip: Make sure that you’ve selected the correct Confluence space for the report.

Curious about how templates can assist you with all things Confluence? Take a look at our guide on using ready-made Confluence templates.
5. Add a Jira shortcut to your Confluence space
If you're not ready to fully integrate Jira into Confluence, there’s still a way to make the switch between platforms quicker and easier.
1. Copy the URL of the Jira project you’d like to create a shortcut for.
2. Navigate to the Confluence space you want to add the shortcut to.
3. In the left-hand sidebar of your Confluence space, you’ll see a section called Shortcuts. Click the add (+) button.

4. Paste the URL you copied earlier into the top box. If you want, you can also add some display text to describe the project you’re linking to.

You can now access your Jira project in a single click!
Information, more streamlined than ever
With Guided Pathways, navigating and managing information has never been easier. Improve your guides, organise your pages, and tailor the experience for your customers.
Related Content
Read moreWritten by

Senior Product Marketing Manager
With more than a decade of expertise in digital and product marketing, Matt serves as a Senior Product Marketing Manager at Kolekti. His passion lies in helping teams effortlessly collect and comprehend user feedback within the Confluence platform.
Related Content
Read more


